以前にPiCar-Xでライントレースを行いました。これはMindstormsでも行った白線と黒線の境界をセンサーで検知し、ステアリングを左右するものでした。
その後MindstormsではAfrel(株)の教材に則ってDeep Learningを使ってライントレースを行いましたが、PiCar-XでもまずはPiCameraを使ってのlane detectionから行ってみます。
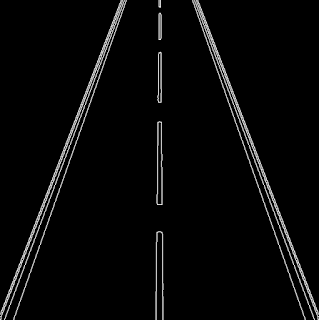
これは、太い白線の道路中央の黄色いラインをPiCameraで捉えてその黄色いラインの位置情報をもとにステアリングを左右に動かすというものです。(下の動画を参照)
下記の記事を参考にしました。
DeepPiCar — Part 1: How to Build a Deep Learning, Self Driving Robotic Car on a Shoestring Budget
また、Packtより
『Applied Deep Learning and Computer Vision for Self-Driving Cars』
が出版されています。ebookで$32ほどですがPacktでは年に何回かセールを行っており、私は$5で買いました。
まずは現状の様子から
下記に画像処理の大まかな流れを示します。
1.PiCameraから画像の取り込み
2.オリジナル画像から作業領域をクロップ
3.画像をBGRからHSVへ変換
4.OpenCV – inRangeで画像を2値化
5.OpenCV – cannyによるエッジ検出
6.region of interest(注目する領域)を設定
7.OpenCV – HoughLinesPによる直線の検出
プログラム全体のコードはここから
言い訳がましく断わっておきますが、私はプログラムの素人です。無駄なこと、間違っていることが有るかもしれませんが、取りあえず動いたのでお許しください。^^;
import time
def make_coordinates(image, line_parameters):
          slope, intercept = line_parameters
          y1 = image.shape[0]
          y2 = int(0)
          x1 = int((y1- intercept)/slope)
          x2 = int((y2 - intercept)/slope)
          return np.array([x1, y1, x2, y2])

def line_select(image, lines):
          data = []

          left_parameter = []
          right_parameter = []

          #-------temp----------
          x1, y1, x2, y2 =0, 0, 0, 0
          xt1, yt1, xt2, yt2 =0, 0, 0, 0
          #-------temp----------

          for line in lines:
              xt1, yt1, xt2, yt2 = line.reshape(4)

              #垂直線への対応
              if xt1 == xt2:
                  xt2 = xt2 + 2

              if yt1 > yt2:
                  x1,y1,x2,y2 =  xt2, yt2, xt1, yt1
              else:
                  x1,y1,x2,y2 =  xt1, yt1, xt2, yt2

              #イレギュラーな不要な線を検出しないように直線の下端が30pixに満たない直線は除く ➡ この操作が必要かは再度検討
              if y2 > 30:
                  data.append([x1,y1,x2,y2])

          line_data = np.array(data)

          #col_numで指定した列を基準にソートする為のindexを取得
          col_num = 2
          sort_index = np.argsort(line_data[:, col_num])

          #sort_indexを元にline_dataをソート
          sorted_line_data = line_data[sort_index,:]

          #left_line
          x1, y1, x2, y2 = sorted_line_data[0]
          left_parameter = np.polyfit((x1, x2), (y1, y2), 1)

          #right_line
          x1, y1, x2, y2 = sorted_line_data[-1]
          right_parameter = np.polyfit((x1, x2), (y1, y2), 1)

          left_line_coordinates = make_coordinates(image, left_parameter)
          right_line_coordinates = make_coordinates(image, right_parameter)

          return np.array([left_line_coordinates, right_line_coordinates])

def show_lines(image, lines):
          lanelines_image = np.zeros_like(image)
          if lines is not None:
            for line in lines:
              X1, Y1, X2, Y2 = line.reshape(4)
              cv2.line(lanelines_image, (X1, Y1), (X2, Y2), (0,250,0), 10)
          return lanelines_image

def show_lines_result(image, lines):
          lanelines_image = np.zeros_like(image)
          if lines is not None:
            for line in lines:
              X1, Y1, X2, Y2 = line.reshape(4)
              cv2.line(lanelines_image, (X1, Y1), (X2, Y2), (0,0,255), 2)
          return lanelines_image

def reg_of_interest(image):
          Image_height = image.shape[0]
          Image_width = image.shape[1]
#          polygons = np.array([[(0, Image_height*(1/2)),(0, Image_height), (Image_width,Image_height), (Image_width, Image_height*(1/2))]])
          polygons = np.array([[(100, 0),(0, Image_height), (Image_width-40,Image_height), (Image_width-100, 0)]])
          image_mask = np.zeros_like(image)
          cv2.fillPoly(image_mask, np.int32([polygons]), 255)
          masking_image = cv2.bitwise_and(image,image_mask)
          return masking_image

# ---------------------------------------

import cv2
import numpy as np
import os
from imutils.video import VideoStream
from imutils import resize
import time
from datetime import datetime

import sys
sys.path.append(r'/home/pi/picar-x/lib')
from utils import reset_mcu
reset_mcu()
from picarx import Picarx

px = Picarx()
px_power = 1

#
px.set_camera_servo1_angle(-5)

# px.set_camera_servo2_angle(-20)
servo2 = -25

# 写真の保存場所
CAM_DIR = "/home/pi/picar-x/Picamera/Result/"

vs = VideoStream(src=0).start()

while True:
    # ファイルの取込
    img = vs.read()
    image = resize(img, width=640)

    # 画像の高さ 幅を取得
    Image_height, Image_width, c = image.shape

    try:
        # オリジナル画像から作業領域をクロップ
        cropped_image = image[int(Image_height/2):int(Image_height/2+100), 0:int(Image_width)]

        # HSV color space
        hsv_image = cv2.cvtColor(cropped_image, cv2.COLOR_BGR2HSV)

        # binary conversion
        lower = np.array([20, 0, 0])
        upper = np.array([40, 255, 255])

        masked_image = cv2.inRange(hsv_image, lower, upper)

        # Canny edge detection
        canny_conversion = cv2.Canny(masked_image, 50,155)

        # region of interest
        ROI_image = reg_of_interest(canny_conversion)

        # Hough変換による直線の検出
        Hough_lines = cv2.HoughLinesP(ROI_image, 2, np.pi/180, 50, np.array([]), minLineLength= 20, maxLineGap=20)

        # Hough_linesをcropped_imageと同じ大きさの黒色のキャンパスに描画
        lanelines_image = show_lines(cropped_image, Hough_lines)

        # left_lineとright_lineの選択
        left_right_lines = line_select(lanelines_image, Hough_lines)

        # left-right_linesをcropped_imageと同じ大きさの黒色のキャンパスに描画
        line_image = show_lines_result(cropped_image, left_right_lines)

        # 上のline_imageとcropped_imageとを合成
        combine_image = cv2.addWeighted(cropped_image, 0.8, line_image, 1, 1)


#-------------------------------------------------------------------------
        #left_line_top
        left_line_top = left_right_lines[0,2]

        #right_line_top
        right_line_top = left_right_lines[1,2]

        center_line = (left_line_top + right_line_top)/2

        #image_center
        image_center = Image_width/2


#-----------------------------------------------------------------------------
        # steer
        steer = (center_line - image_center)/image_center * 80

        px.set_camera_servo2_angle(servo2)
        px.set_dir_servo_angle(steer)
        px.forward(px_power)
        time.sleep(0.1)
        px.forward(0)

        #
        text = 'left:' + str(left_line_top) + ' ' + 'right:' + str(right_line_top)

        cv2.putText(combine_image,
            text=text,
            org=(10, 30),
            fontFace=cv2.FONT_HERSHEY_SIMPLEX,
            fontScale=0.7,
            color=(0, 255, 0),
            thickness=1,
            lineType=cv2.LINE_4)

        filename = time.strftime("%Y%m%d%H%M%S") + ".jpg"
        save_dir_filename = CAM_DIR + filename
        cv2.imwrite(save_dir_filename,combine_image)

    except:
        #print('Exception!')
        #print('photo No', filename)
        pass